Gorgeous kitchen sinks and stunning faucets were a stand out feature at KBIS 2020. – With so many colors and styles to choose from, it was easy to get swept up in the creative atmosphere, walking the brightly lit booths, all while pondering ways to incorporate little changes to achieve the most dramatic impact on the look of your home.
A quick way to update and refresh the look of your kitchen is to replace your existing sink. This simple change can completely renew the look of your area, creating your own unique space to whip up delicious dishes, with easy clean up afterward!
Are you looking for a sleek modern appearance? Maybe timeless transitional? Or does the comfort of a warm and inviting farmhouse make you feel more at home? While sinks come in several mounting types, you might be surprised at how easy it is to install a drop-in or top-mount basin yourself. In just a few easy steps, you can customize your space to showcase any number of styles, and we’ll walk you through it step by step!
First, measure your existing basin, and its drop-in dimension to ensure the sink you want to replace it with will fit. Carefully pay attention to the number of faucet holes and configuration, making sure that they match the number of handles and sprayer options of your new or existing faucet. (Now would also be the ideal time to replace or upgrade your faucet) Check out our tutorial here!
Great! So, you’ve chosen your perfect drop-in sink. Now, before starting anything, let’s prepare.
Before you start: Gather your tools.
- New sink basin
- Plumber’s tape
- Plumber’s putty
- Needle-nose pliers
- Screwdriver (flat & Phillips)
- Plumber’s wrench
- Adjustable wrench
- Basin wrench
- Utility knife
- Clear silicone
- Caulk gun
- Putty knife
- Bucket
Removing your old sink
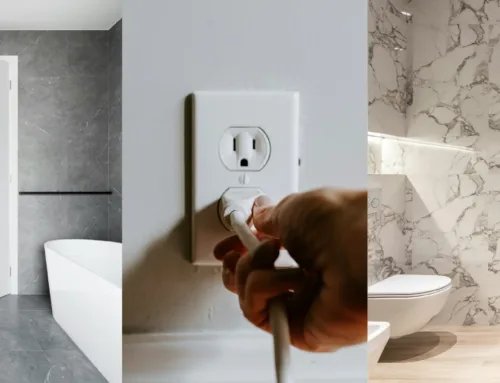
- Shut off the water under the sink at the shutoff valve, and turn on the faucet to drain any remaining water. If you have a disposal, make sure to unplug that as well.
- After disconnecting the hot and cold water supply lines, with an adjustable wrench, using a basin wrench, remove the nut holding the faucet tailpiece assembly in place, and remove the faucet.
- For the next step, keep that bucket handy to catch any dripping water. Disconnect the drain pipe and p-trap and remove the dishwasher drain line, sometimes clamped onto the garbage disposal. (Remove the garbage disposal following the manufacturer’s instruction.)
- Next, Turn the mounting clips, found all along the underside edge of the sink, sideways towards the inside of the sink bowl. You may need a screwdriver. Now gently slide a utility knife under the rim of the sink to loosen the sealant, taking care not to gouge or scratch your countertop by keeping it flat against the counter’s surface.
- Push from below and lift the old sink out and set aside. Clean any remaining sealant from the countertops, allow to dry, and we can move on to installing your new sink!
Installing your NEW sink
- Set your new basin into the opening to verify that it fits.
- Install your faucet and any extra components, applying silicone sealant around the openings.
- Run plumber’s putty around the edges of the drain and install strainer pressing firmly, then tilting the sink, place and secure rubber gaskets and threaded flange. Repeat for any additional drains, or reattach the disposal per the manufacturer’s directions.
- Run a bead of fresh silicone sealant along the underside rim of the sink, flip right side up and position the sink. Remove excess sealant.
- Tighten the mounting clips underneath the sink, then connect the drainpipe, dishwasher drain line, and disposal.
- Now connect the water supply lines to the faucet, making sure to join the hot on the left and cold on the right. Turn on the water supply and check for any leaks.
- Plug-in your disposal to complete your project.
ENJOY YOUR NEW KITCHEN SINK!
Product Spotlight: K-5010
Single Handle Pull-Down Pre-Rinse Kitchen Faucet
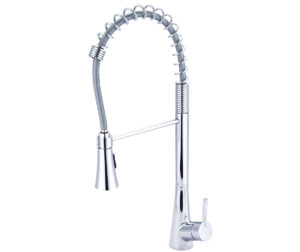
Available in: Polished Chrome – Brushed Nickel – Matte Black
- Single Handle Pull-Down Kitchen Faucet
- Lever Handle
- Pull-Down Head with 2 Spray Patterns Swivel 360°
- 7-5/8″ Reach, 7-1/4″ from Deck to Aerator, 21-1/4″ Overall Height
- 1 or 3-Hole 8″ Installation
- Easy-Install 30″ Flex Supply Lines With 3/8″ Connections
- Ceramic Disc Cartridge with Temperature Limit Cap
- Quick Connect Spray Head Hose and Weight, Easy-install mounting nut
- With 1.8 GPM Flow Rate
- Deck Cover Plate Included
CERTIFICATIONS
- ADA Compliant